
Hi, how are you all ? How have you all been? I am sorry for my absence over the last couple of weeks, unfortunately I have not been very well. Won’t bother you with all the details but I will say I feel as if I am on the mend, so much so that I managed to create today’s video showing you how to make a box for your chocolate bar.
I always like to gift chocolate and every year I try to come up with some packaging for them. So this is the first of probably many!!
Whilst I am here, I would just like to thank you all very much for coming along today to read my blog. I do hope that you will be inspired to make your own boxes.
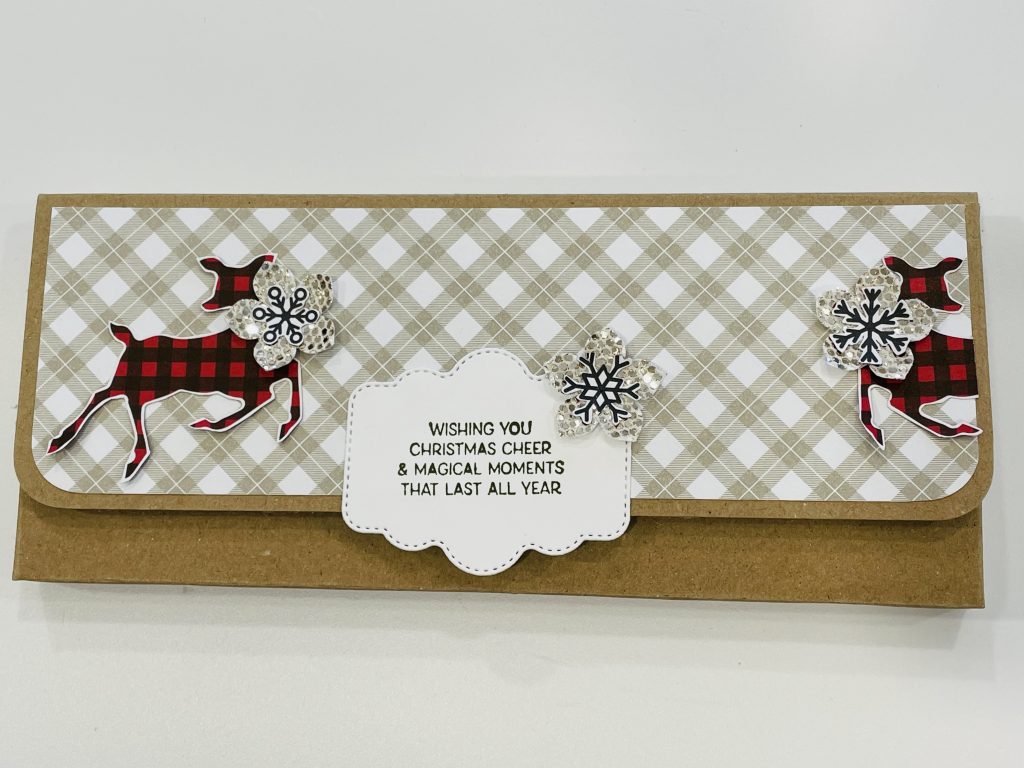
Box made with the gorgeous Whimsy & Wonder DSP

Another box using Kraft card.
Products Used
- A4 Basic White card stock
- Blushing Bride card stock
- Whimsy & Wonder Designer Series Paper (DSP)
- Pretty Pillow Box dies
- Whimsical Trees Stamp Set
Instructions
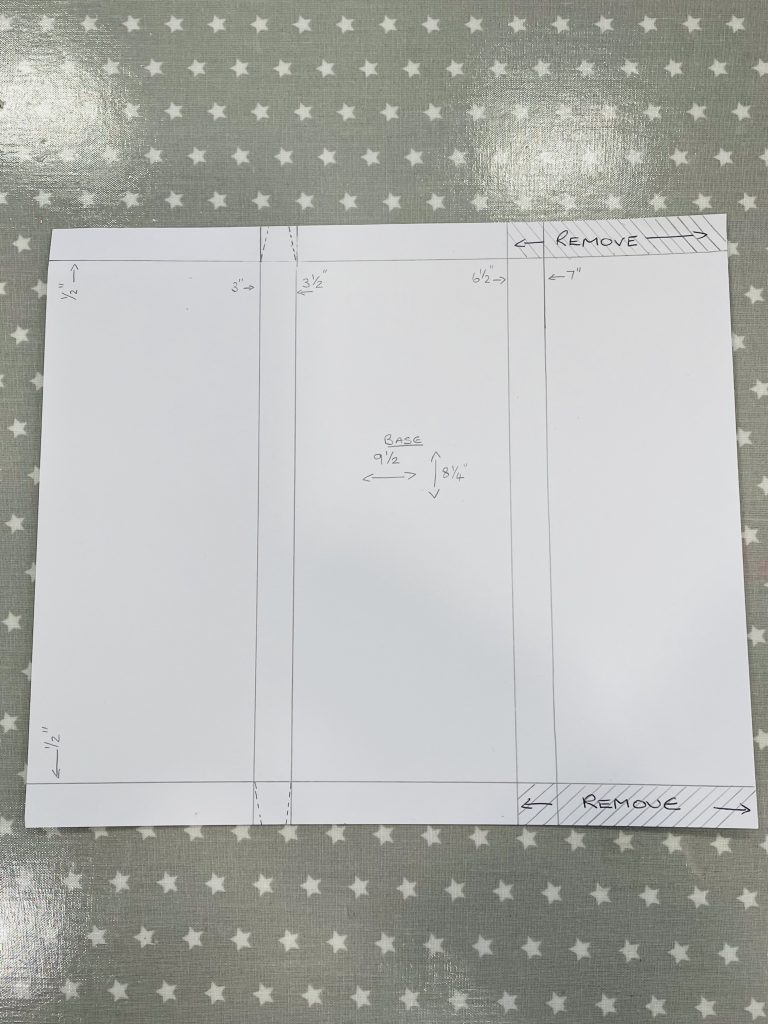
Cut your A4 piece of thick white card stock by placing the long side to the top of your cutter and cutting down at 9 1/2″. Your piece of card should now measure 9 1/2″ x 8 1/4″.
With the long side at top of cutter you are going to score at 3″, 3 1/2″, 6 1/2″ & 7″. Now turn your card with short side at top of cutter score at 1/2″ on both the right & left hand edges.
Fold & burnish all of your score lines as this will help when you are cutting.
Cut your card as per the pictures 1 & 2.
Picture 1
Picture 2
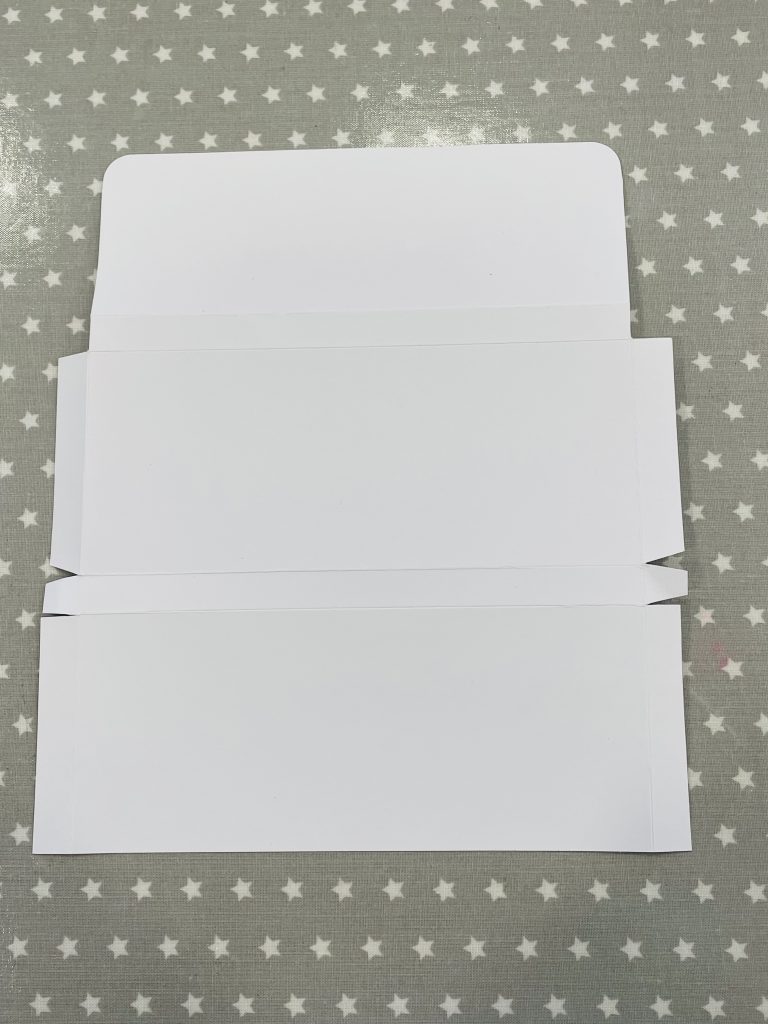
How to put together
If you have a corner rounder, round off your corners on the shortest of the flaps that has no tabs. This is your front fold.
Place your card with the right side up. Add glue to your two small tabs, then flip the largest flap up and over so the small glued tabs connect to your centre tabs. Make sure these line up straight. Add glue to the tabs that are on the largest flap (glue inside the flap) and then line up with the side and back of box. Please watch video for instructions if this not very clear!!
To Decorate
Front flap: Card stock measuring 7″ x 2 1/4″, DSP to measure 6 7/8″ x 2 1/8`’.
IF YOU HAVE ROUNDED YOUR CORNERS, REMEMBER TO ROUND OFF YOUR DECORATION TOO.
Inside: Card stock measuring 7 1/8″ x 2 7/8″. I stuck my card stock down and then punched the half circle.
I cut two labels from the Pretty Pillow box dies from white card stock. On the front one I stamped my sentiment from the Whimsical Trees stamp set using Mossy Meadow ink.
I also cut another label from some glitter card and layered it behind my label to give it a little glitz!
The inside label was placed under the front flap so that I could write a message on it.
Everything decorated with fussy cut pieces from the Whimsy & Wonder Designer Series Paper.
You can now decorate as you wish!
Video
Here is a video to show you how to make a box for your chocolate bar
Classes at Home or in person
KITS
Many of us are at home and wondering how to fill our time. Well, I can offer monthly card kits to keep you busy. Please click here for more details.
CLASSES
I run a class in a lovely hall in Hailsham – Click here for more details.
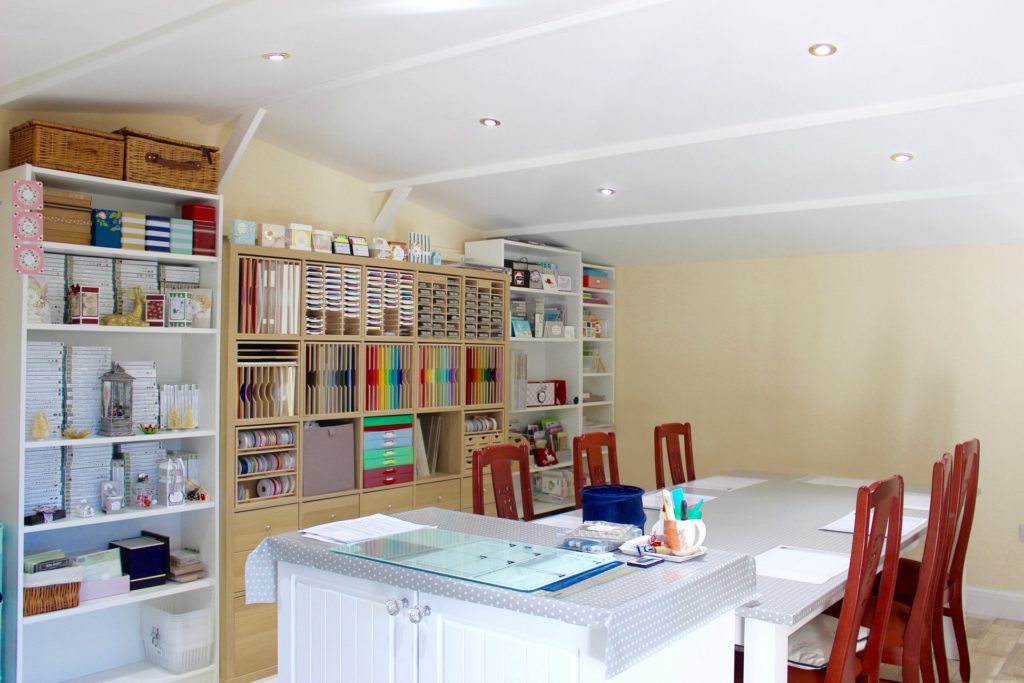
Classes are now being held in my lovely Studio on a regular basis. If you would like details, just click on the picture below.
Thinking of joining Stampin’ Up! ?
So, do you know what you will receive by signing up? There are certainly many rewards and benefits that are on offer!
One of the first benefits you will receive will be your bespoke “Starter Kit” which will be £130.00 worth of your chosen product for just £99.00 and it will be sent to your home absolutely free of charge! You will also receive business products too to help you start your very own business (if that is what you wish to do).
That is not all, you will also receive a 20 / 25% discount on all of your future products . You will be one of the first to know about new products and offers, you can have your own dedicated website/shop and you can join exclusive Facebook groups for inspiration and assistance, should you need it. So whether you are someone who just wants to buy the lovely products for yourself and your family & friends or whether you want to start your own little crafty business, I am here to help you.
If you think that this will be of interest to you, just click on the link here for more details.
MINI CATALOGUE AVAILABLE UNTIL DECEMBER 2021
Thank you for stopping by today.
Take care
Jan x


")
 Specialty Designer Series Paper")